As this is an extremely involved and fairly lengthy upgrade we’ve decided to try something new and keep our readers updated on a weekly basis.
Update 13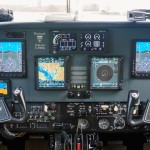
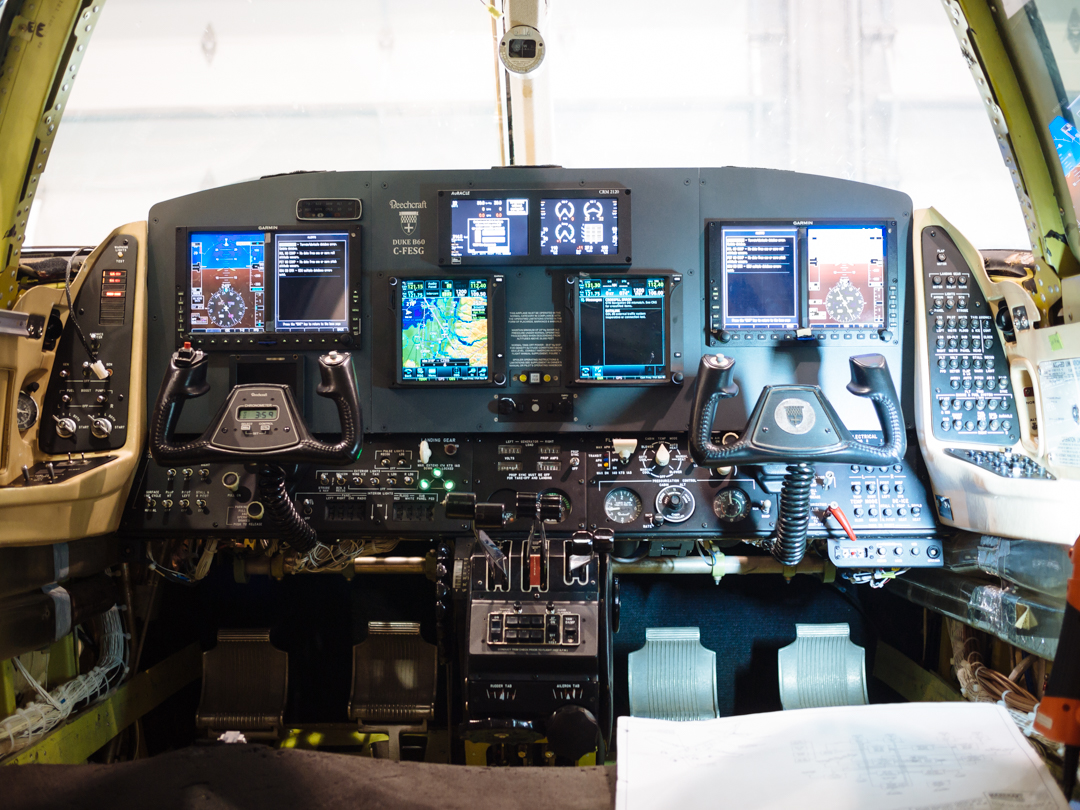
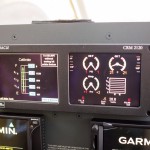
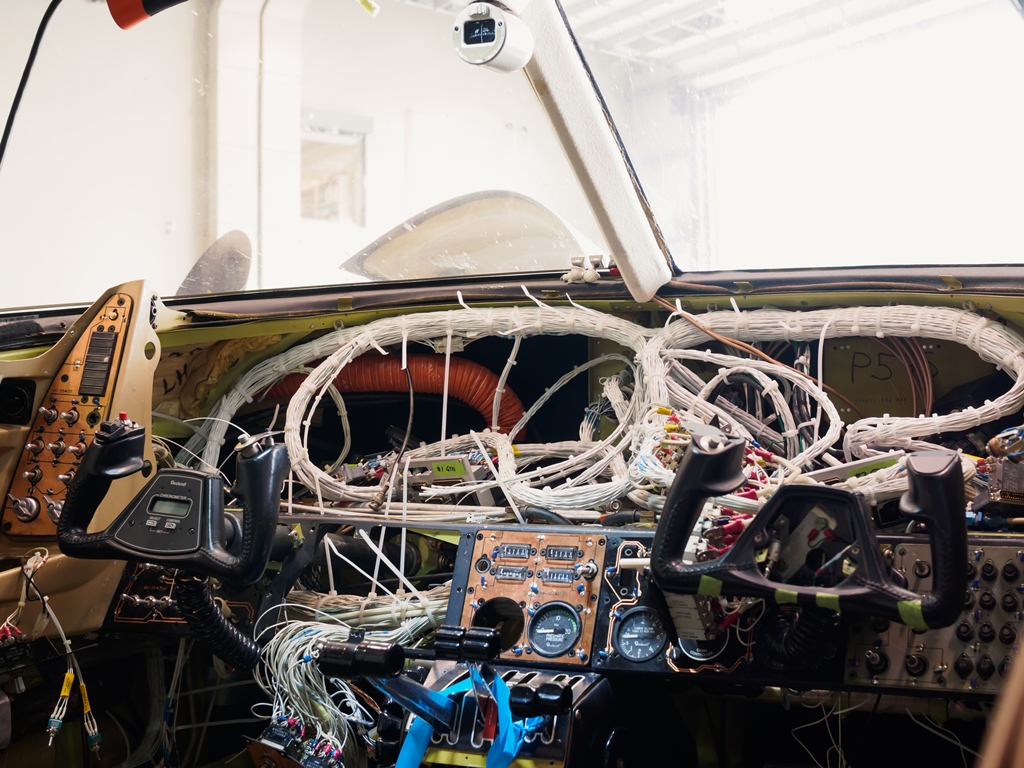
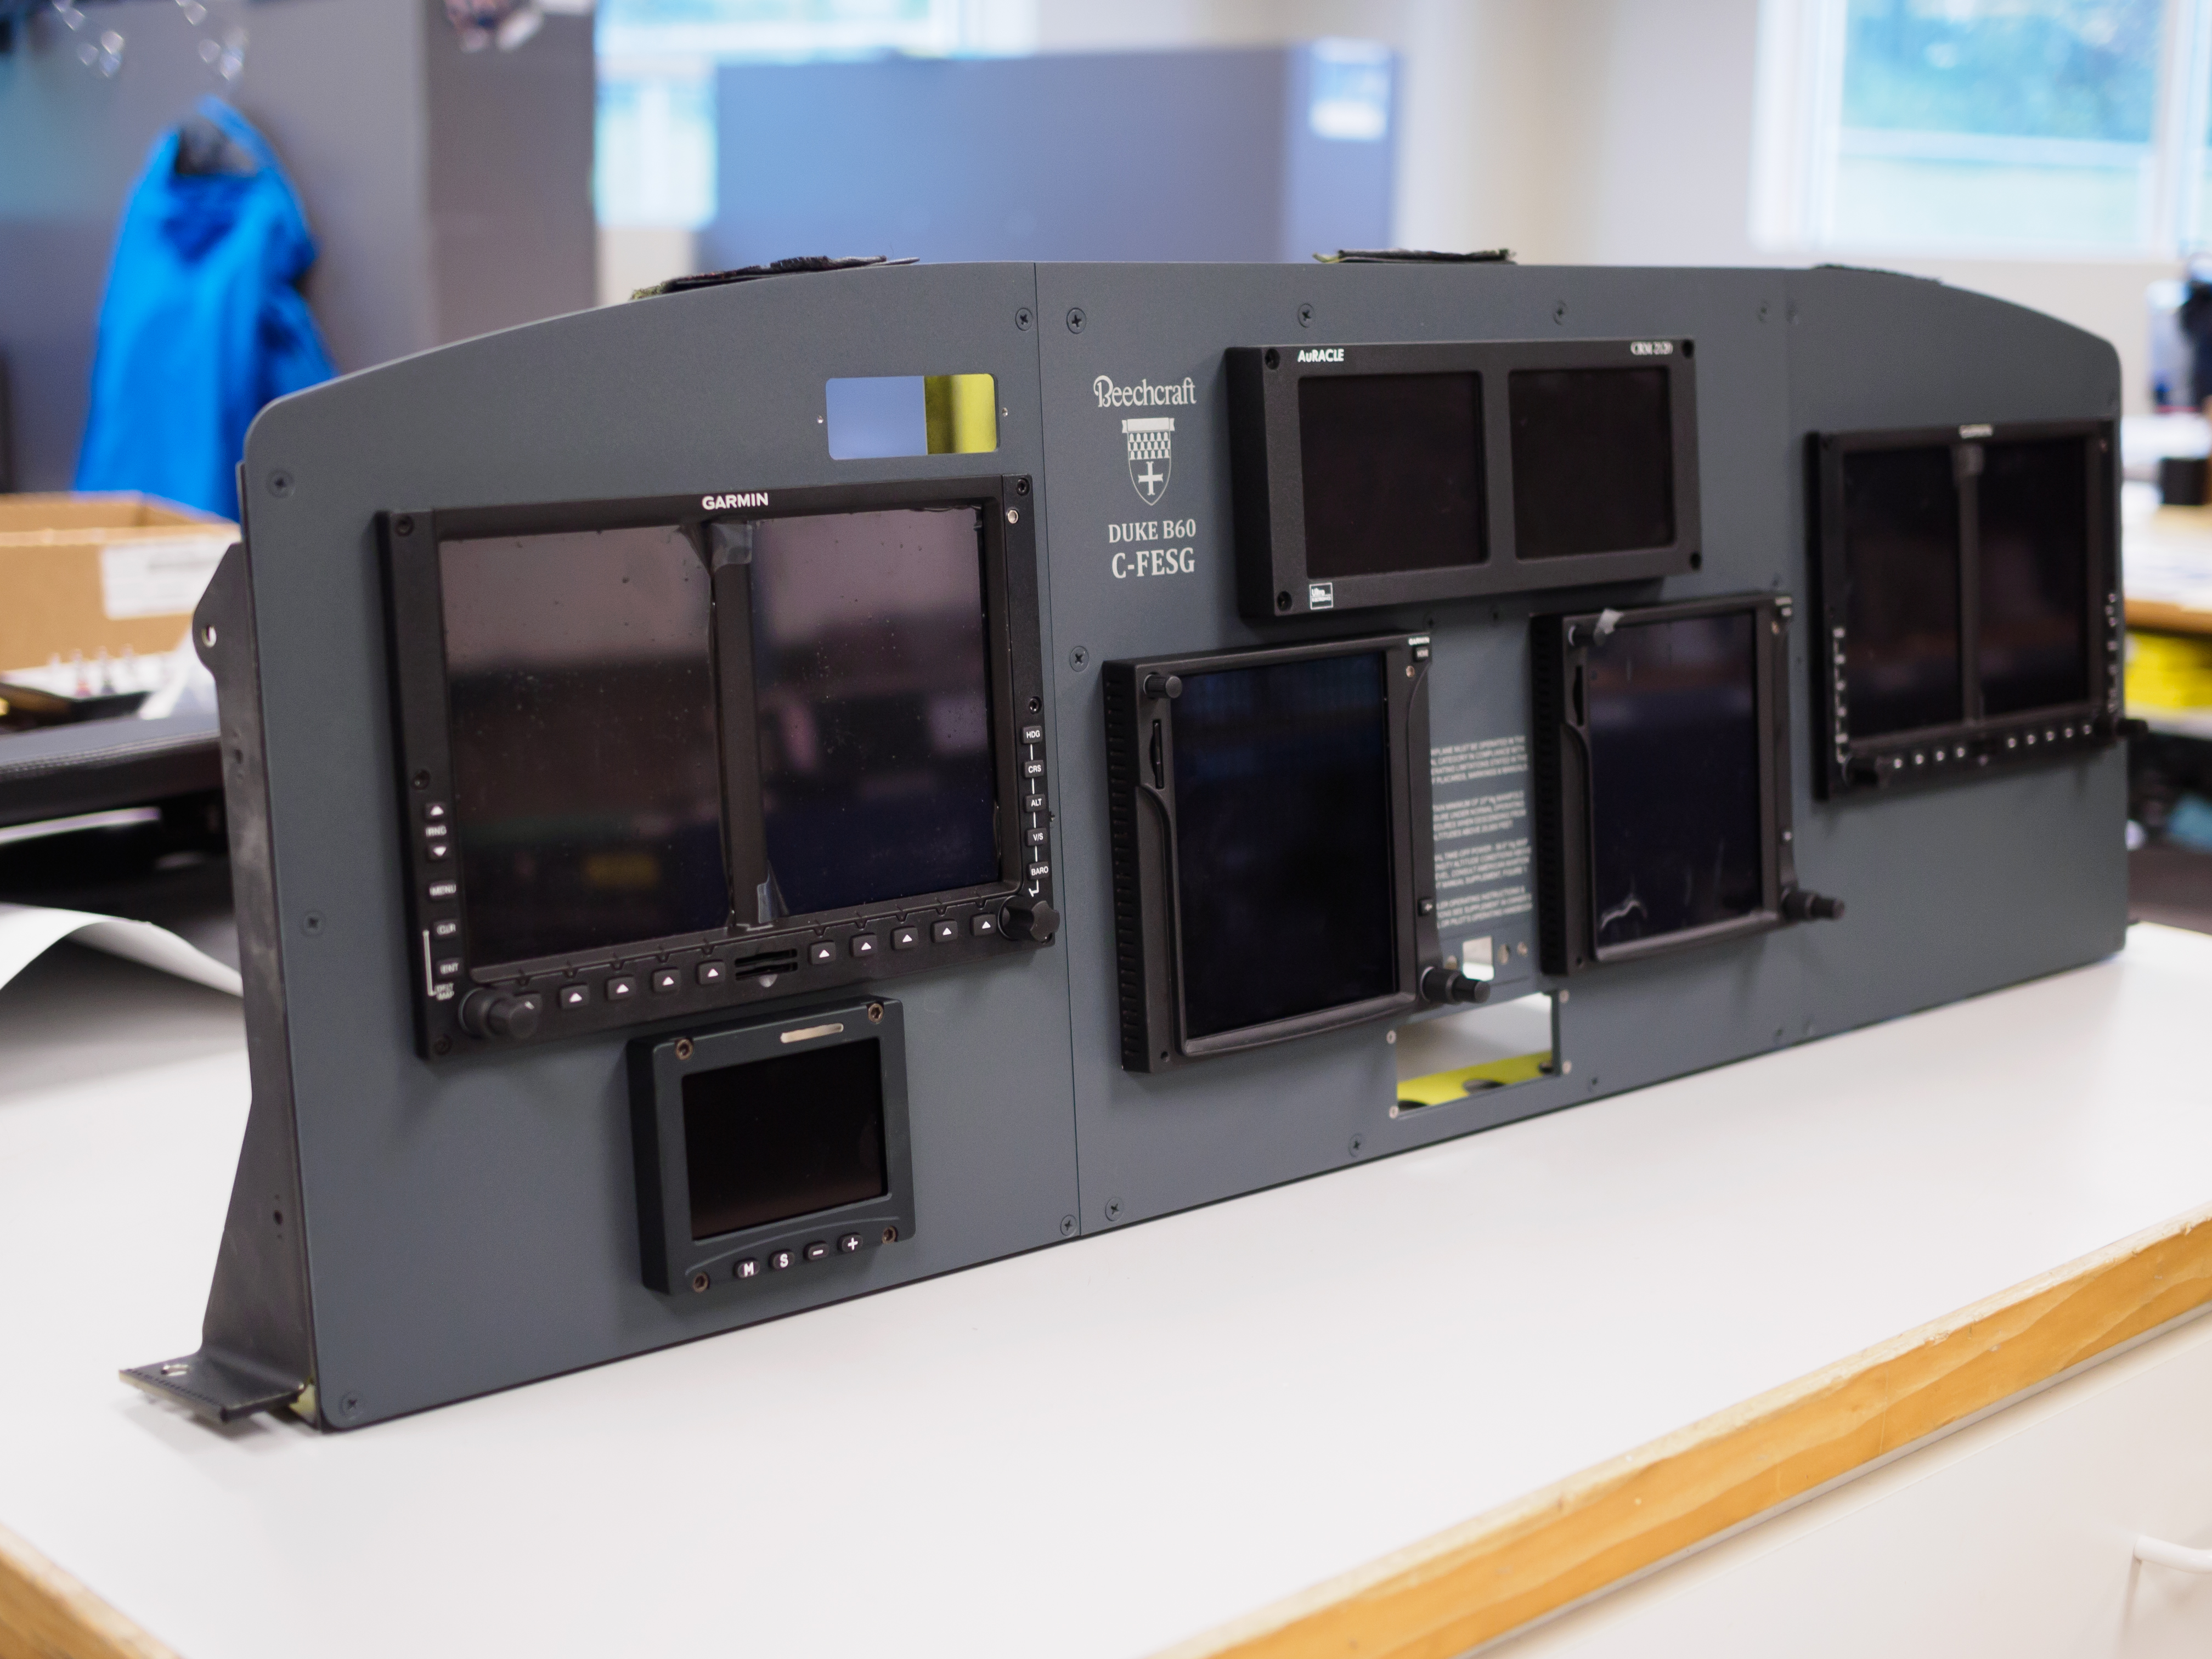
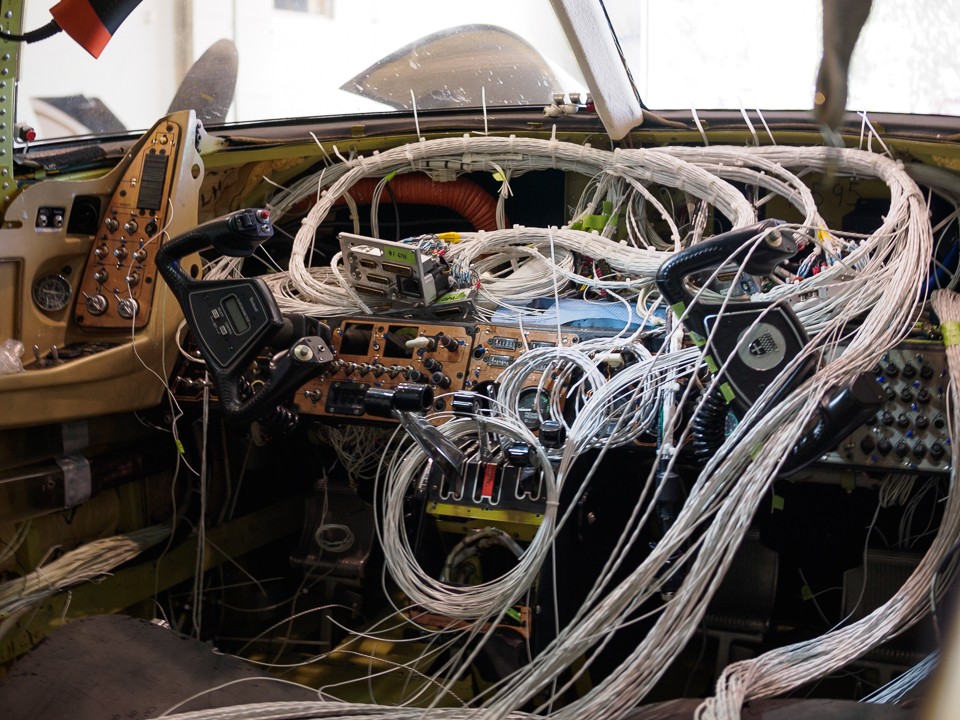
On the ramp powered up with the typical operational screen set up.
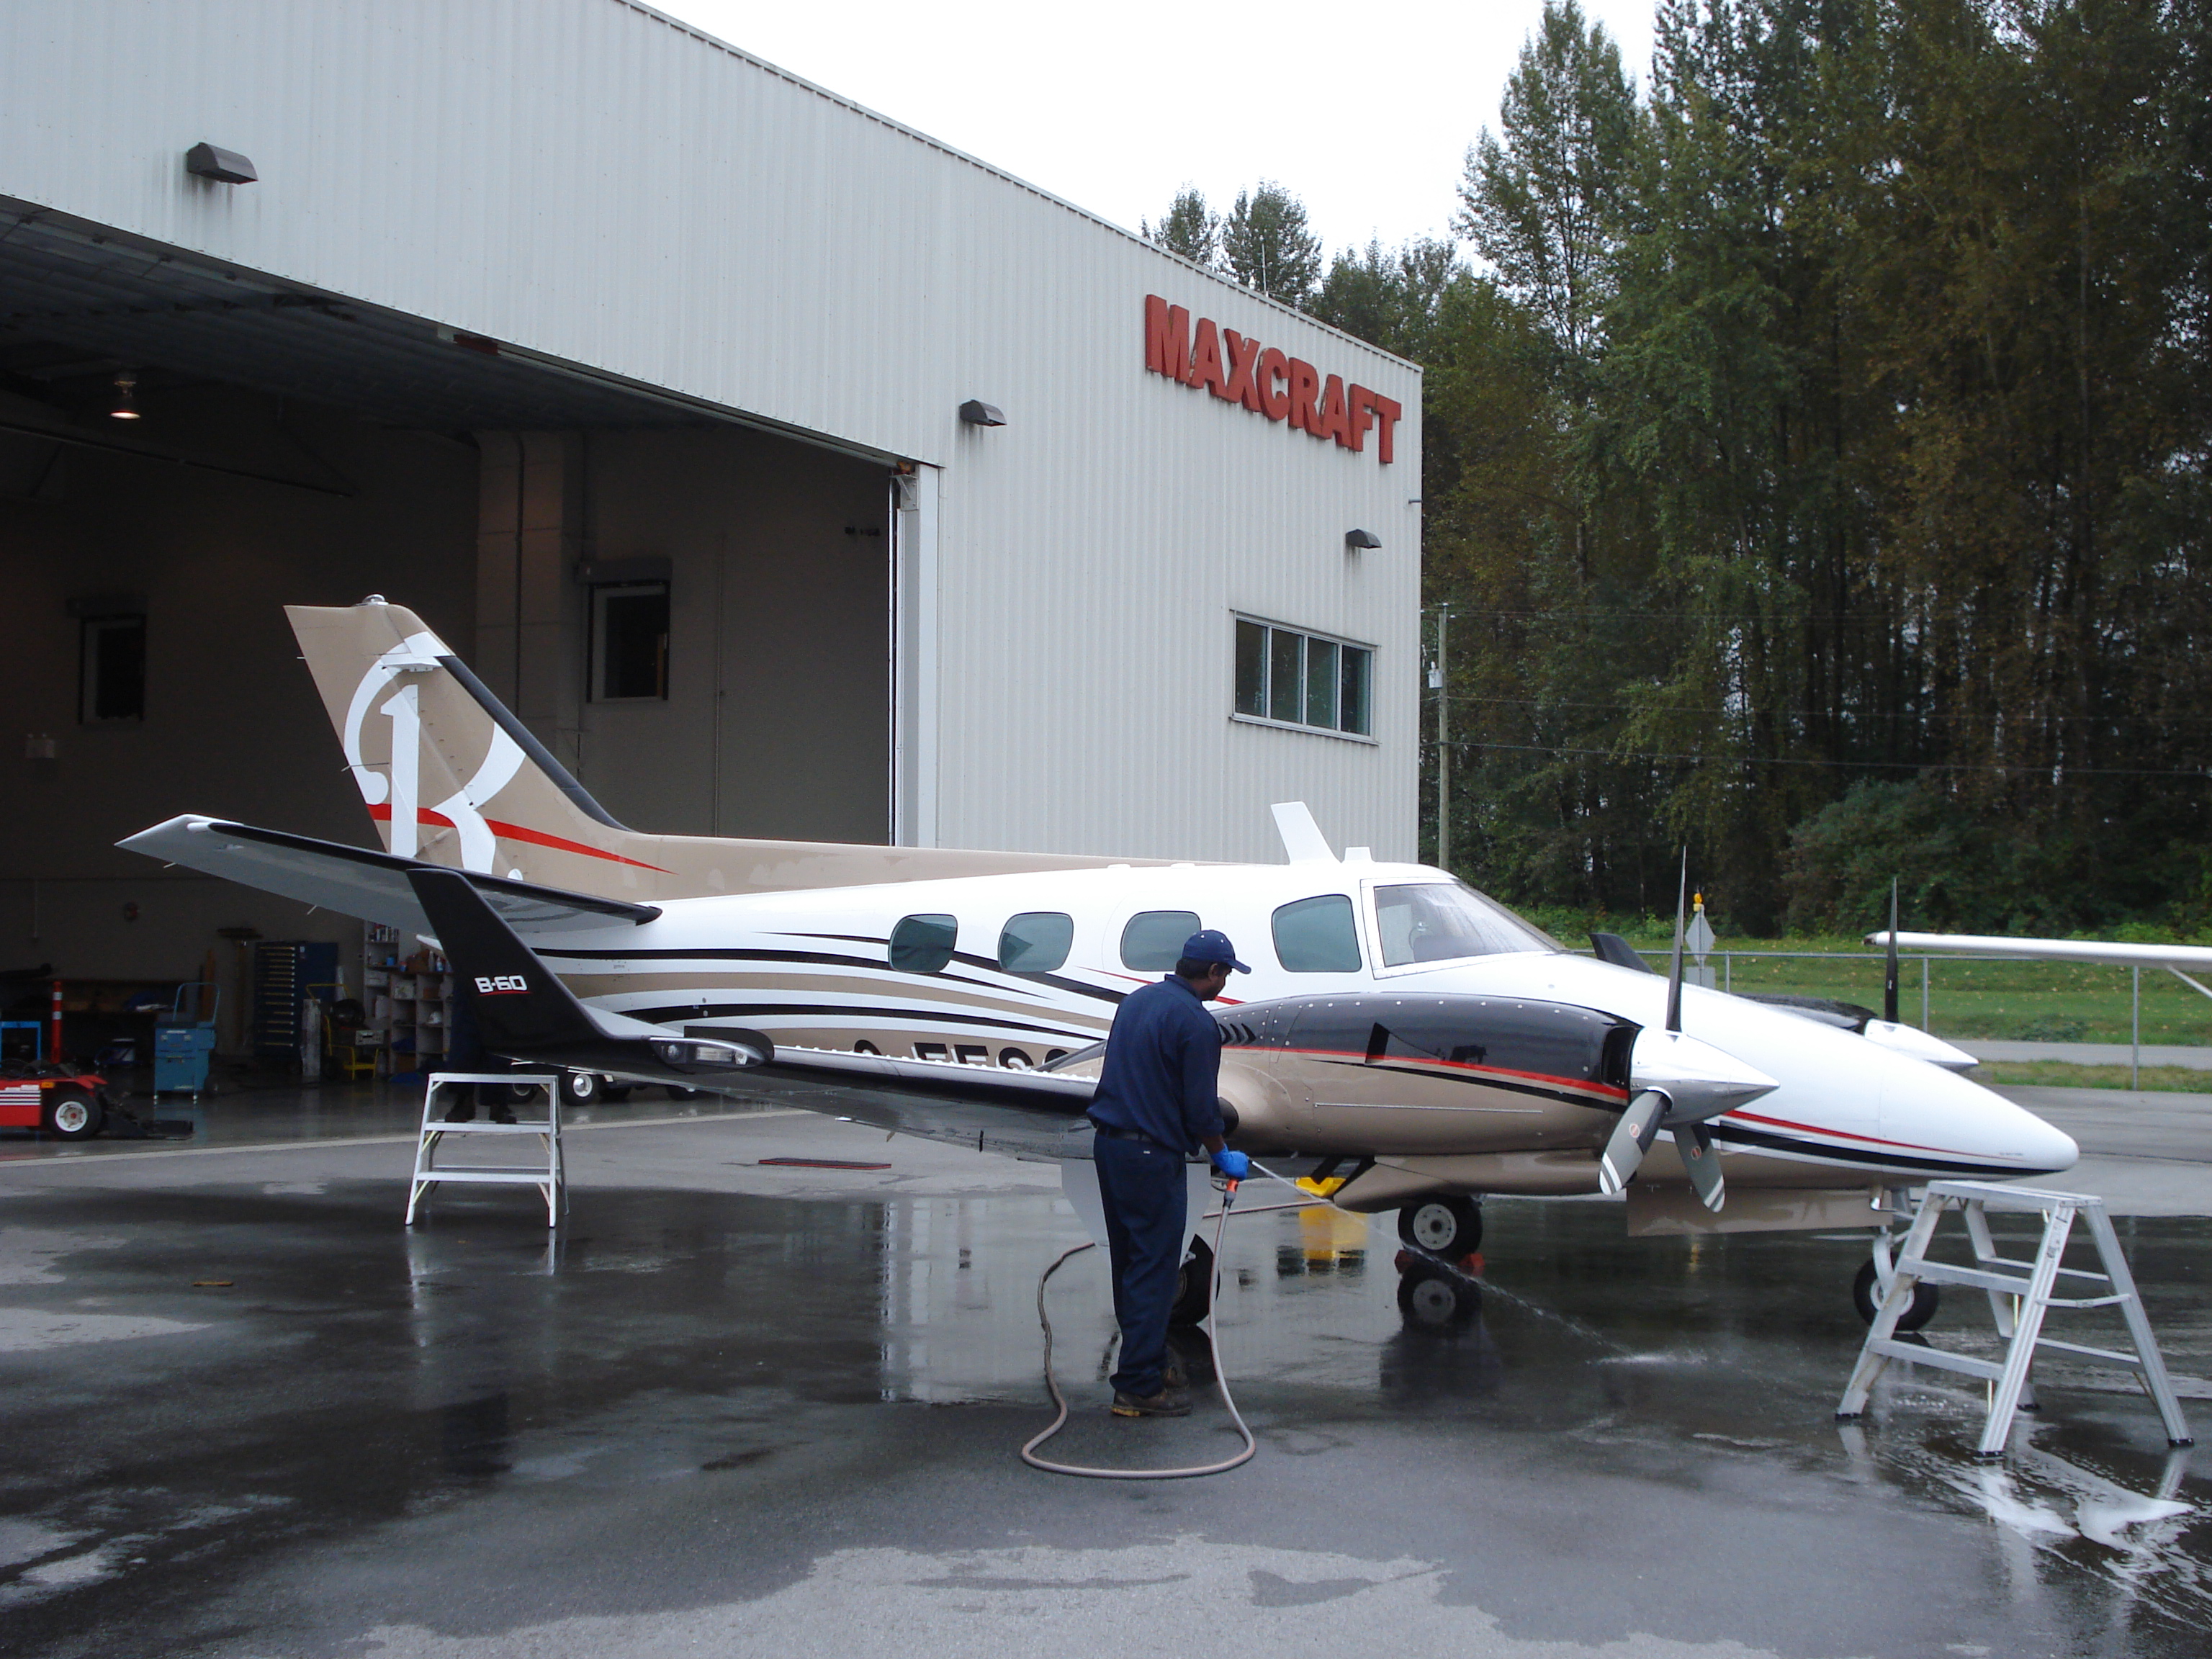
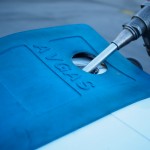
Today will be the last of our Duke blog posts and we hope you have enjoyed the saga of a major panel redo like this. The project has wrapped up completely, and the plane is waiting for pick up. Resolution of last week’s final pesky autopilot snags was confirmed this week through our final test flight. As previously mentioned on this blog, Maxcraft hires a test pilot to assist in test flights and to root out snags for our technicians. Autopilot tests included heading, altitude, pitch and vertical speed. As of this latest test flight, everything in the autopilot has checked out okay. The avionics flight testing which followed immediately afterwards involved an ILS approach down to minimums, followed by an RNAV approach. Once again, all systems performed flawlessly. Often these test flights are combined with a free familiarization and training session for the owner, but in this case the owners were absent and out of town at the time of the test. A familiarization flight will take place in the coming week as the aircraft is picked up. In the mean time, the plane has been detailed and washed, the AVGAS topped up, and the interior re-installed, waiting only to be flown away.
Interior re-installed, cleaned, detailed and aircraft is ready for customer pick up.

Shortly after test flight.
Although this type of custom panel is our specialty, and we typically have numerous projects on the go at any given time, we are especially proud of this one. It clearly demonstrates what we can do to design and optimize a true full-glass panel, especially when working with client input. That said, there’s no time for our technicians to take a break as we have two helicopters and a Pilatus PC-12 coming in next week for major panel upgrades!
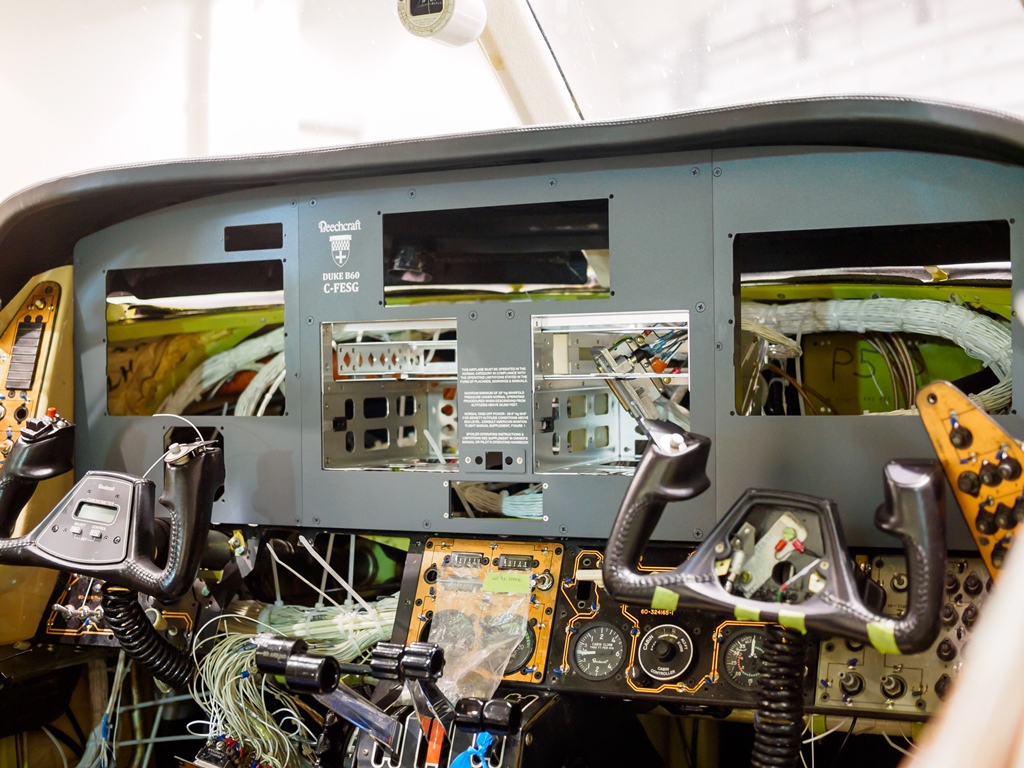
Update 12

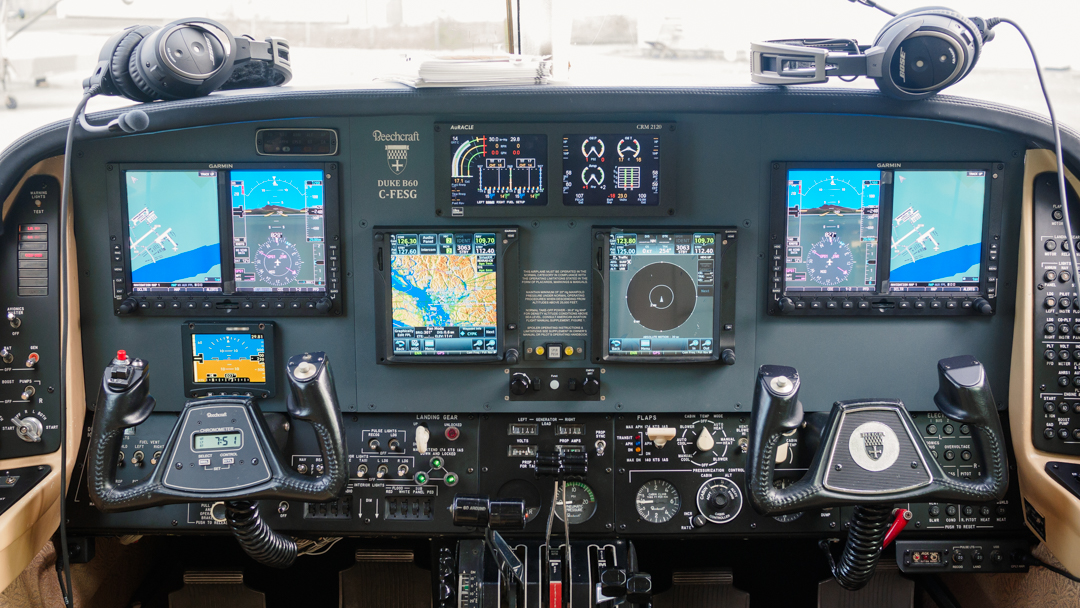
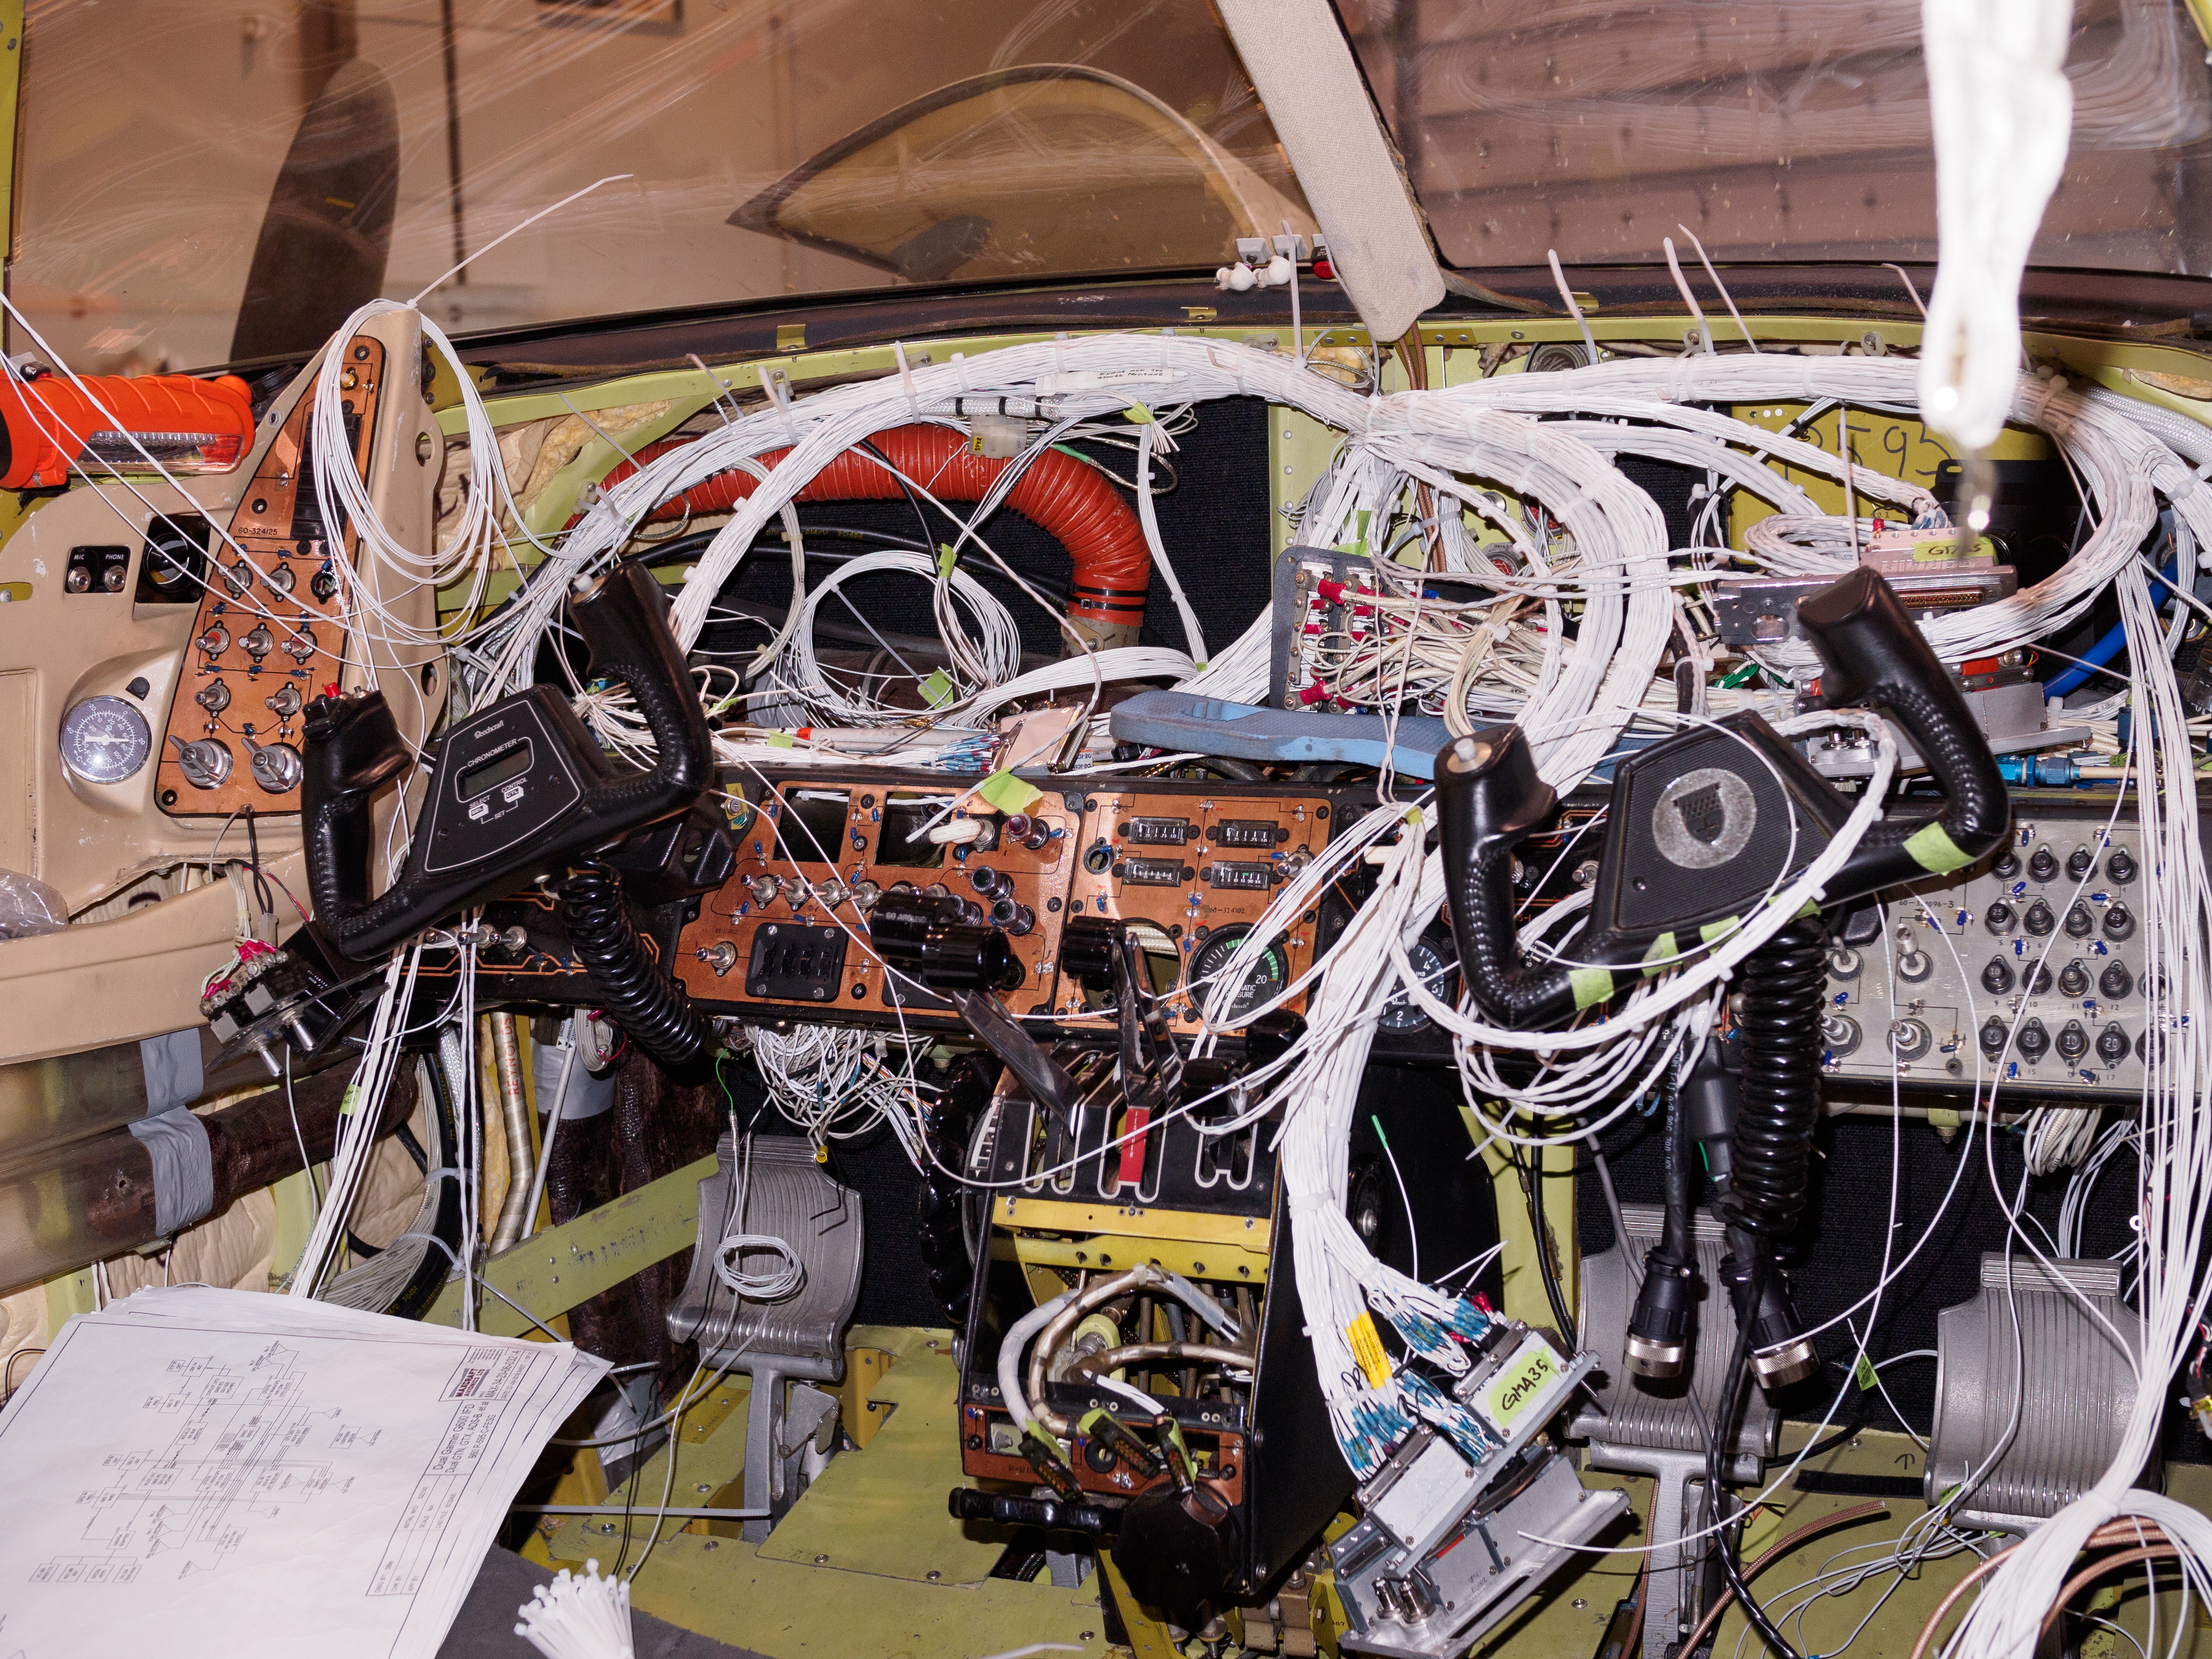
As promised last week, here’s a good look at the completed avionics panel all lit up.
A major milestone was met on Monday following a weekend of troubleshooting and diagnostics: Don, our test pilot, and Daryl (our president) took the Duke up for a test flight. This flight raised some good news and some bad news — the good news being that everything installed and configured by our crew functions and interfaces wonderfully, even with the old autopilot. The bad news is that the legacy autopilot itself appears faulty.
Several defects in The Duke’s existing autopilot system were reported by our clients during the early planning stages, and a few more were raised by our own pre-install test flight. These were all issues that were thought to have been resolved. Our own component shop bench tested all servos and updated solenoids for two of them. Servo mount clutches were reset for correct override torque and control cables were corrected for tension. Our bench technicians also repaired an intermittent controller and replaced non-functional annunciator lights. The KFC-250 autopilot computer was sent out to a specialized repair facility for evaluation and repair as required. As it turns out there were several faults requiring repair. Following re-installation into the aircraft the system passed ground check making it ready for flight check.
A potentially faulty autopilot computer.
Continued intermittent faults in the autopilot system are still being traced. Diagnostics have eliminated our own bench repairs as a cause, leaving either faulty wiring or the autopilot computer as the root of the problem. Integrating legacy systems like this is always a challenge, even when they’re working properly. However, it’s often the right move. The comparative rarity of this aircraft makes its list of approved autopilots very short and expensive. The difference between repairing this legacy autopilot (which has no inherent deficiencies) and purchasing a new one is tens of thousands of dollars.

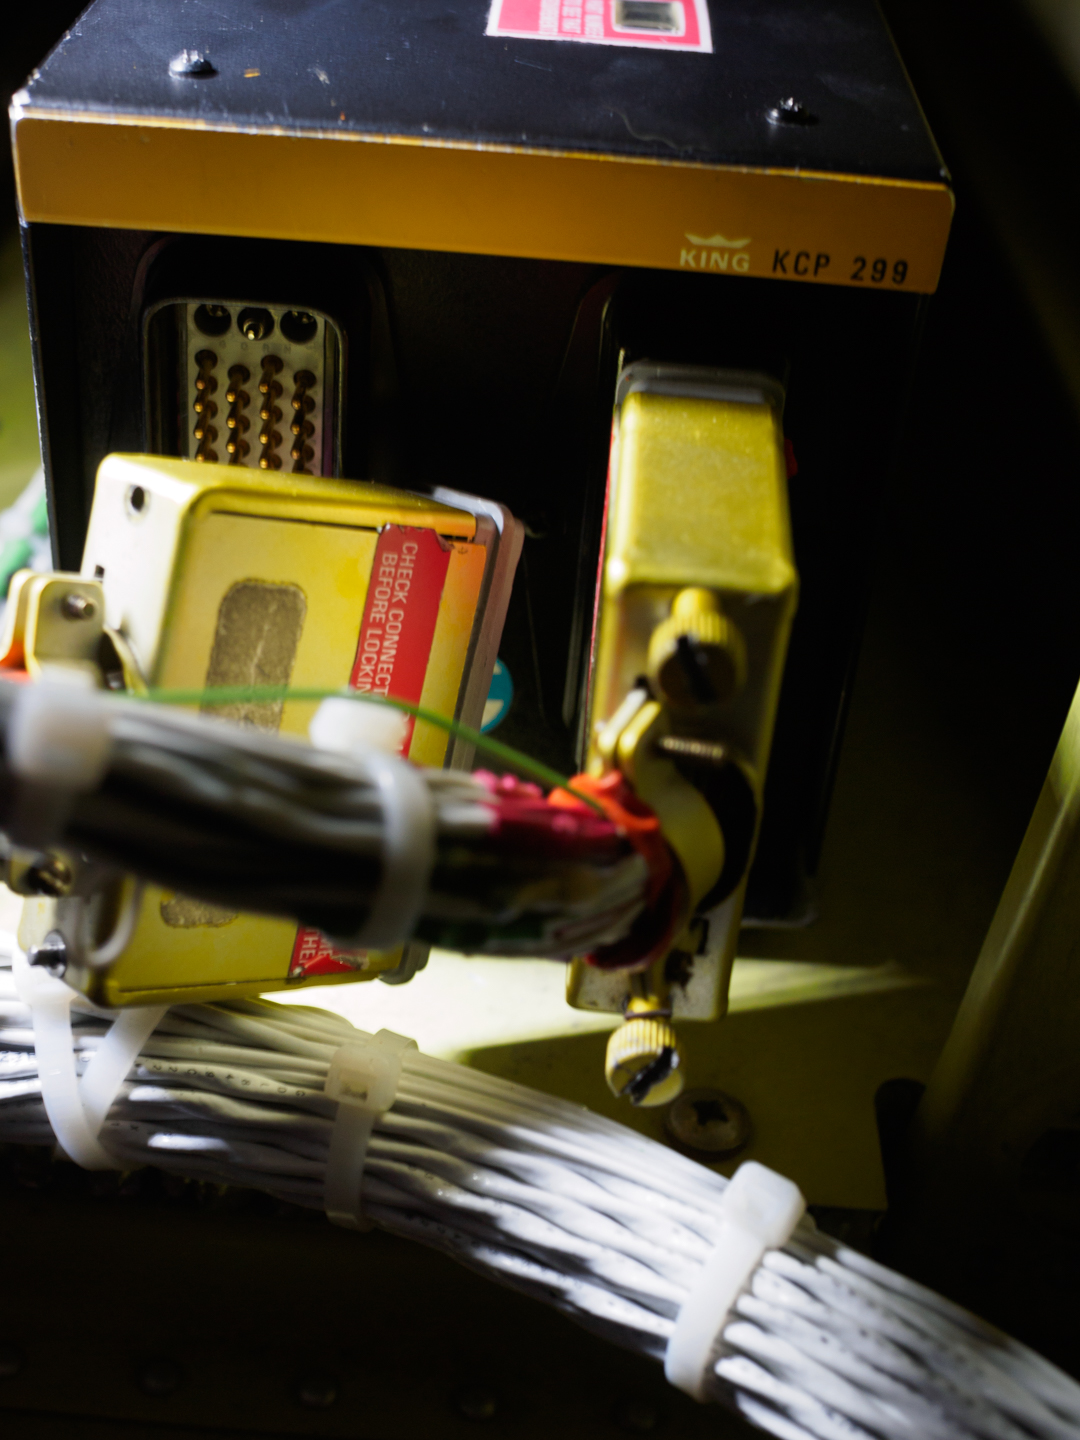
The offending plastic cover removed from the autopilot computer.
Addendum – Friday 4:00pm: Late this afternoon the autopilot faults described above were finally traced to a protective plastic cover across an unused test connector on the bottom of the autopilot computer. The plastic cover was found to be conductive and caused a short across the contact .
The unfortunate result of all this is that the aircraft did not make its Wednesday departure date. While the rest of the avionics suite functions flawlessly and the plane can still technically fly, a lack of autopilot would mean handbalming the aircraft all the way to Tennessee, a potentially dangerous action with a complex aircraft like The Duke.
Detailing shop cleaning the plane inside and out.
As a side note, The Duke underwent interior and exterior detailing this week. Earlier, our large crew, long shifts, and the aircraft’s general state of dis-assembly made work like this impossible. Our diagnostic team, however, is much smaller and more focused than our install crew, making it easier to fit in sub-contracted personnel like detailers. Detailing is one of the many value-added solutions that Maxcraft can provide as part of a comprehensive solution.
Update 11
A small panel preview. Nicer photos are coming in the near future.
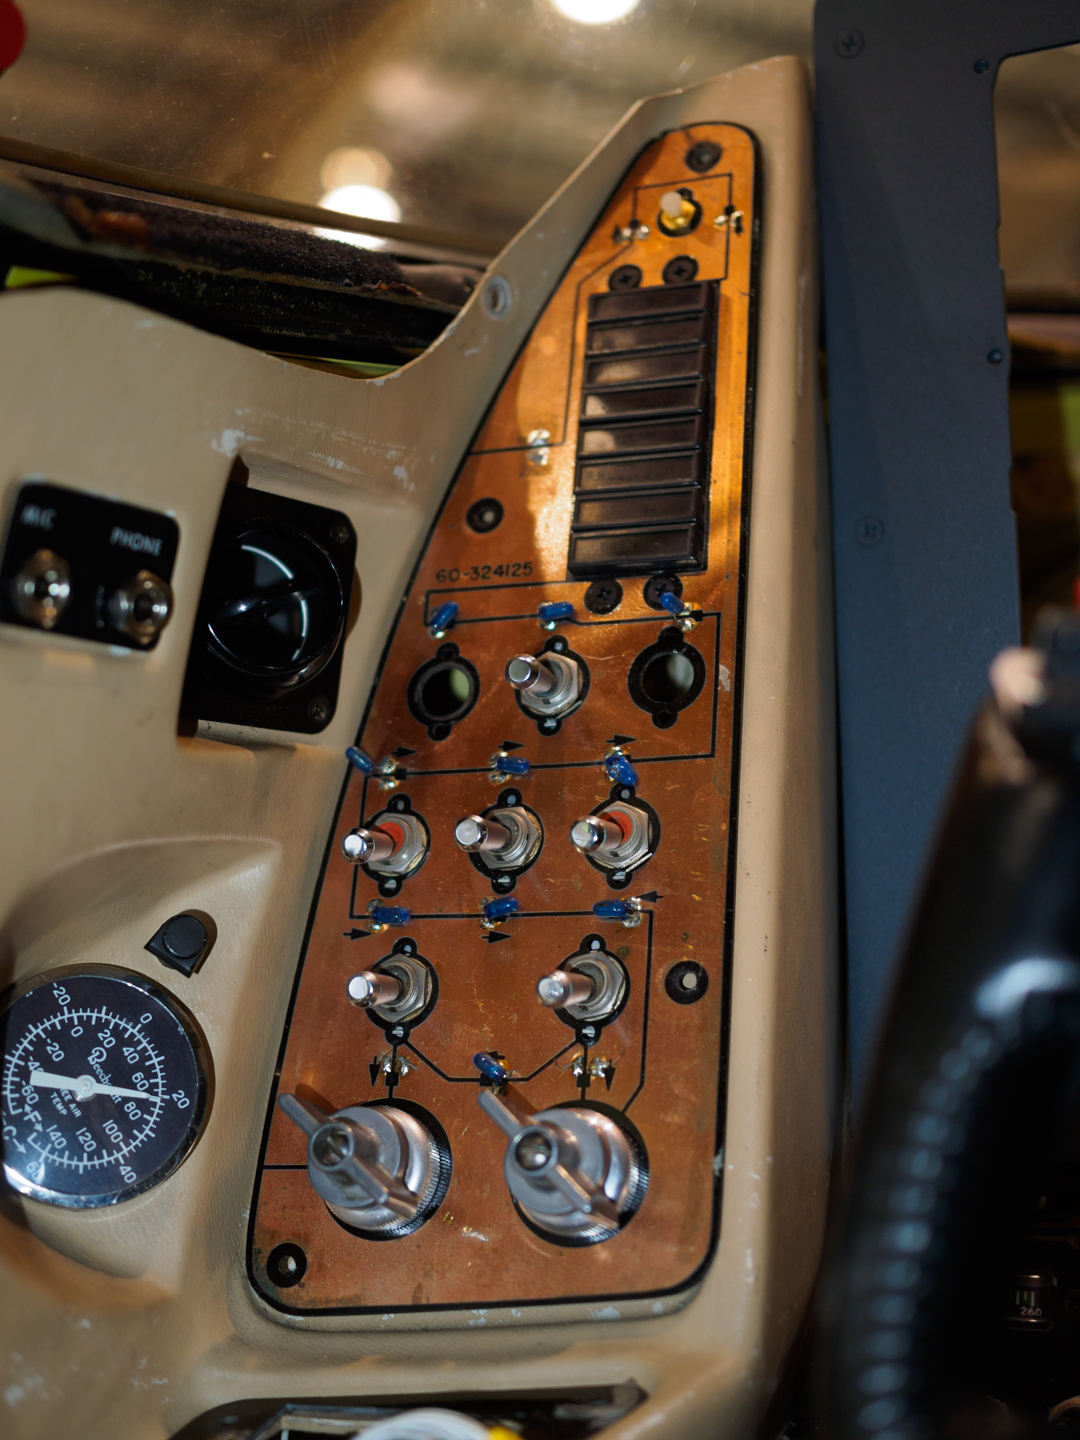
As was expected, testing and configuration last week raised a number of snags. For a custom avionic project with this level of complexity to run flawlessly the first time you turn it on is unlikely. Unfortunately, troubleshooting for those snags has run into its second week, but our team is working late into the night to resolve them. We still believe our deadline is achievable. We’ve been in close communication with our clients regarding our timetable, and they are well aware of the complexity of the project. We won’t get into too much technical detail here except to note that the process for identifying the source of these snags and correcting them is a logical and orderly affair that our AMEs are very familiar with. Notable faults discovered by our testing involve the Auracle engine monitor, the KFS250 autopilot system, and GTS825 traffic advisory system.
Second ground Run
Our first issue with the Auracle engine monitoring system was quickly resolved, and involved a relatively simple fix. Interestingly, once the system was functional, the data it provided during our second ground run revealed the #2 engine to have oil pressure slightly below spec. There was also an RPM split across the two engines. These are issues the old analog gauges would never have shown. A third-party mechanical AME will be inspecting the engines this week to sort out those faults. Snags with the legacy autopilot system remain unresolved as of this post, but likely involve the way it interfaces with the newer systems. [EDIT: issues are resolved pending a flight check – 10/10/2014 5:10pm]. Trouble with GTS825 traffic system is suspected to be a software configuration issue.
In the meantime I thought we should take time to explain the troubleshooting process. In response to the complexity of today’s systems, Maxcraft hires a test pilot to assist in test flights and to list snags to our technicians. This has helped tremendously. Although our technicians are quite skilled they’re not veteran pilots, and although owners know their aircraft well, they’re not likely to be familiar with the new systems we’ve installed. Don, our test pilot, has flown just about every type of airplane, knows our systems inside and out, and is able to describe snags with detail and precision. He typically goes up with the owner and “wrings out” avionic kinks, while also providing a familiarization flight. Maxcraft happily provides this service at no charge to its fixed-wing clients because it ensures not only that aircraft leaving our hangar they are in working order, but also that owners understand the operation of their new systems.
Update 10

A quote from one of our techs: “You put the cowlings on and it looks like a real plane again!”
Wiring and installation of major avionics equipment is completely finished, but that doesn’t mean we’re flying yet – and a deadline is still looming.
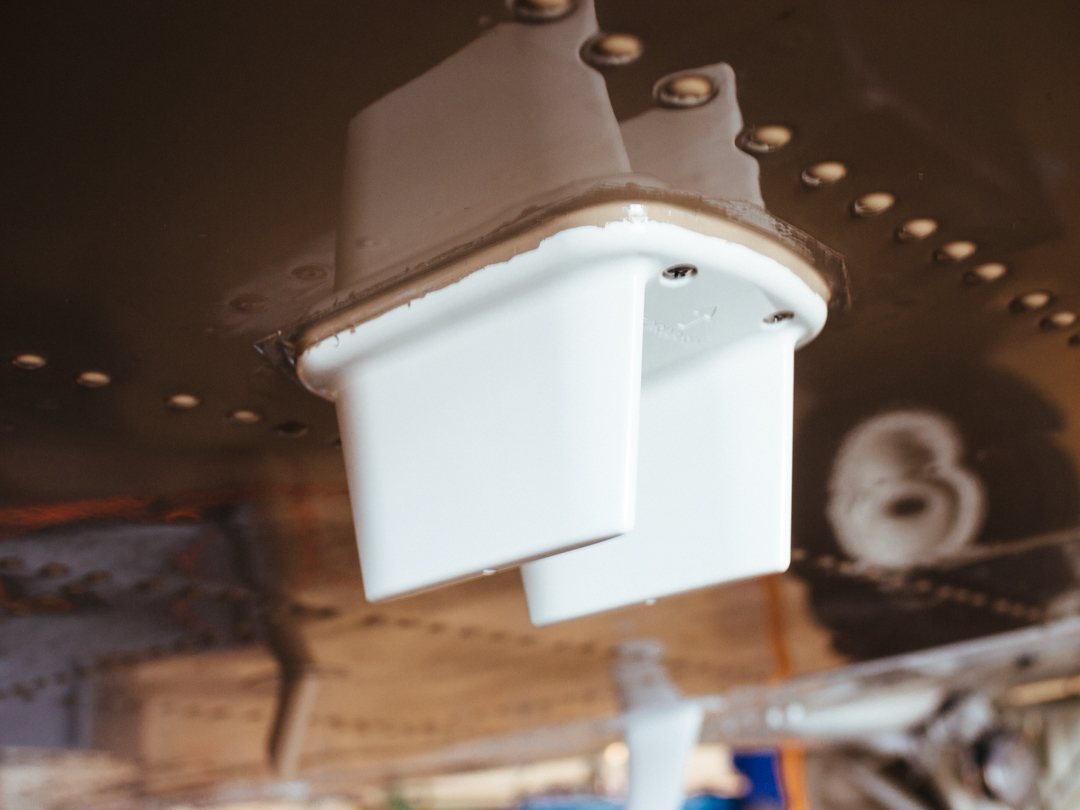
New traffic antenna
What remains to be done before this aircraft can fly consists of reassembly, calibration and configuration. Reassembly tasks this week included installing antennas, engine cowlings, autopilot servos, newly overhauled fuel quantity sensors, overlay panels, and the hard-to-source trim servo cable we discussed last week. Installing the refurbished overlay panels requires a lot of care and attention so as not to damage the 100+ individual backlights mounted behind the overlays.

The only two lights that work are the ones that we replaced.
In fact, more than half of these tiny and very delicate incandescent lights were non-functional, and needed replacement before the overlays could be mounted. Not does replacement involve soldering each bulb individually, the bulbs themselves cost five dollars each. If the lights are not precisely aligned when the overlay goes on, the bulbs are crushed.
-
- Refurbished overlay.
-
- The same panel before refurbishment
One of the side panels with the overlay off.
Configuration and calibration involved a battery of checks and tests across all systems. As of this very moment, our techs are calibrating and testing the fuel quantity system, which involves refueling the aircraft and physically comparing the state of the tanks to readouts on the new Auracle engine monitoring system. Other checks this weekend will include a ground run, AHRS checks, compass calibration and a possible flight checks if all goes well. Inevitably, these various tests and checks raise small issues that require troubleshooting. While time for this is budgeted as part of the process, there is a lot of potential for unexpected curveballs at this stage. A minor fault or small deviation in precisely the wrong place could potentially mean waiting weeks for a backordered part. Obviously, any avionics facility worth its salt will try to minimize the number of unknown variables long before this phase, but there’s only so much you can do. Even on a perfectly planned project, there’s a lot that remains up in the air (or perhaps, in the worst case scenario… down on the ground).
-
- Fueling up for calibration
-
- Engine monitor in calibration mode.
As a side note, the aircraft was also weighed this week and we are happy to report a reduction of about 53lbs and more importantly the C of G has moved forward from its previous configuration.
Update 9
This week was an eventful one with a lot of milestones passed, especially in terms of unique parts sourcing. First we received a newly refurbished glare shield courtesy of Port Interiors, one of our frequent partners. Upon receiving it, we did a quick test fitting on the aircraft with our finished panel structure. Our long-awaited fuel tank sensors also arrived late last week. Those parts were sent out for refurbishment some time in week three, as new replacements are nearly impossible to find especially on short notice.
Glare shield test fitting with panel.
The damaged flight control cable which our crew identified during initial inspection was an even rarer and difficult part to source, and will only arrive in our hands on Saturday. Our stores and inventory personnel initially went to Beechcraft to procure the item, but were more or less given the run around. No lead times were given, but we were assured that after a month we could expect someone to contact us and possibly discuss the matter. Needless to say, this was not acceptable for our timetable. Shopping around led us to a supplier who claimed to have the certified part in inventory, but was in fact building and certifying the parts to order. The lead time was long but technically fit within our timetable, albeit with narrow margins. Tomorrow morning an employee will be driving to Vancouver International to pick up at the YVR FedEx depot.
Fantastic stitching work on the glare shield from our colleagues at Port Aircraft Interiors.
Wiring Progress
Speaking of panels, wiring progress in the cockpit over the past week has leaped ahead to much more finished look. This is due, in part, to a series of split shifts over the last week, which allowed much of the crew easier access to the plane and with more elbow room. The crew also completed wiring on each nacelle for the Auracle engine monitoring system.
Not a lot of elbow room!
Laser engraving in progress.
After last week’s laser engraving. The structural work on the main panel is also more or less complete, allowing us to give you a look at its final form. This is something that customers are often very excited to see. In fact, the aircraft’s owner dropped by for a quick visit and inspection. In preparation for the visit, the crew did a bench mock-up of the final panel with equipment installed.
Daryl and Clarke meeting with customer (middle).
Because the instrument panel work is at its final stages, we will not be discussing much more on this particular project. I’d like to finish up by noting that while the bulk of our work here is Avionics and technology, we’ve also made a point of providing a top-grade and highly customized panel. This is somewhat uncommon for an Avionics facility, but we feel that going this extra mile results in an impressive custom product that we can really be proud of. It’s also something that sets us apart from the average shop, which often settles for a simplistic paintjob and a labeller.
The process by which we create these panels and the combination of technologies that we’ve chosen for that process is unique. It is the result of careful research and selection and as far as we know, there are no other shops in Canada that can provide a professionally laser engraved and powder coated panel the way Maxcraft can.
Custom laser engraved Beechcraft Duke logo.
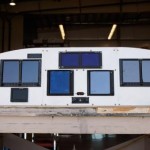
Equipment mounted on final panel.
Update 8
Eight weeks in and the Duke project has entered what is informally known as ‘crunch time’. There are hard deadlines on the horizon (the plane is booked to be at the Duke convention in Tullahoma, TN in Oct), the crew is running full tilt, and technicians are now pulling overtime. This is the phase that makes or breaks a project, and though it might be slightly immodest to say so, it’s also what separates the pros from the rest.

Wiring continues
With the numerous AWRs (Additional Work Requirements), snags, repairs, and parts sourcing issues, we are not as far along in the schedule as planned. The key to good project management is recognizing these inevitable deviations early and applying corrective measures through the alteration of timetables and the reallocation of resources. While by our own standards, we are at times behind schedule and need to apply corrective action, the end result is that the Maxcraft team consistently pulls through to meet client deadlines. This is no exaggeration; it’s a fact and we’re proud of it.
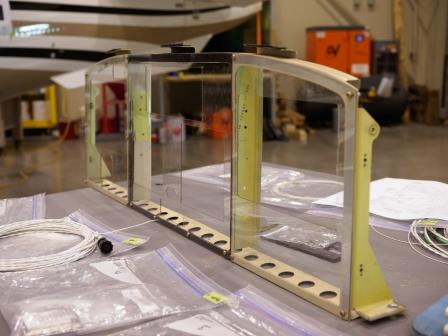
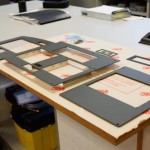
First plexiglass panel test fitting
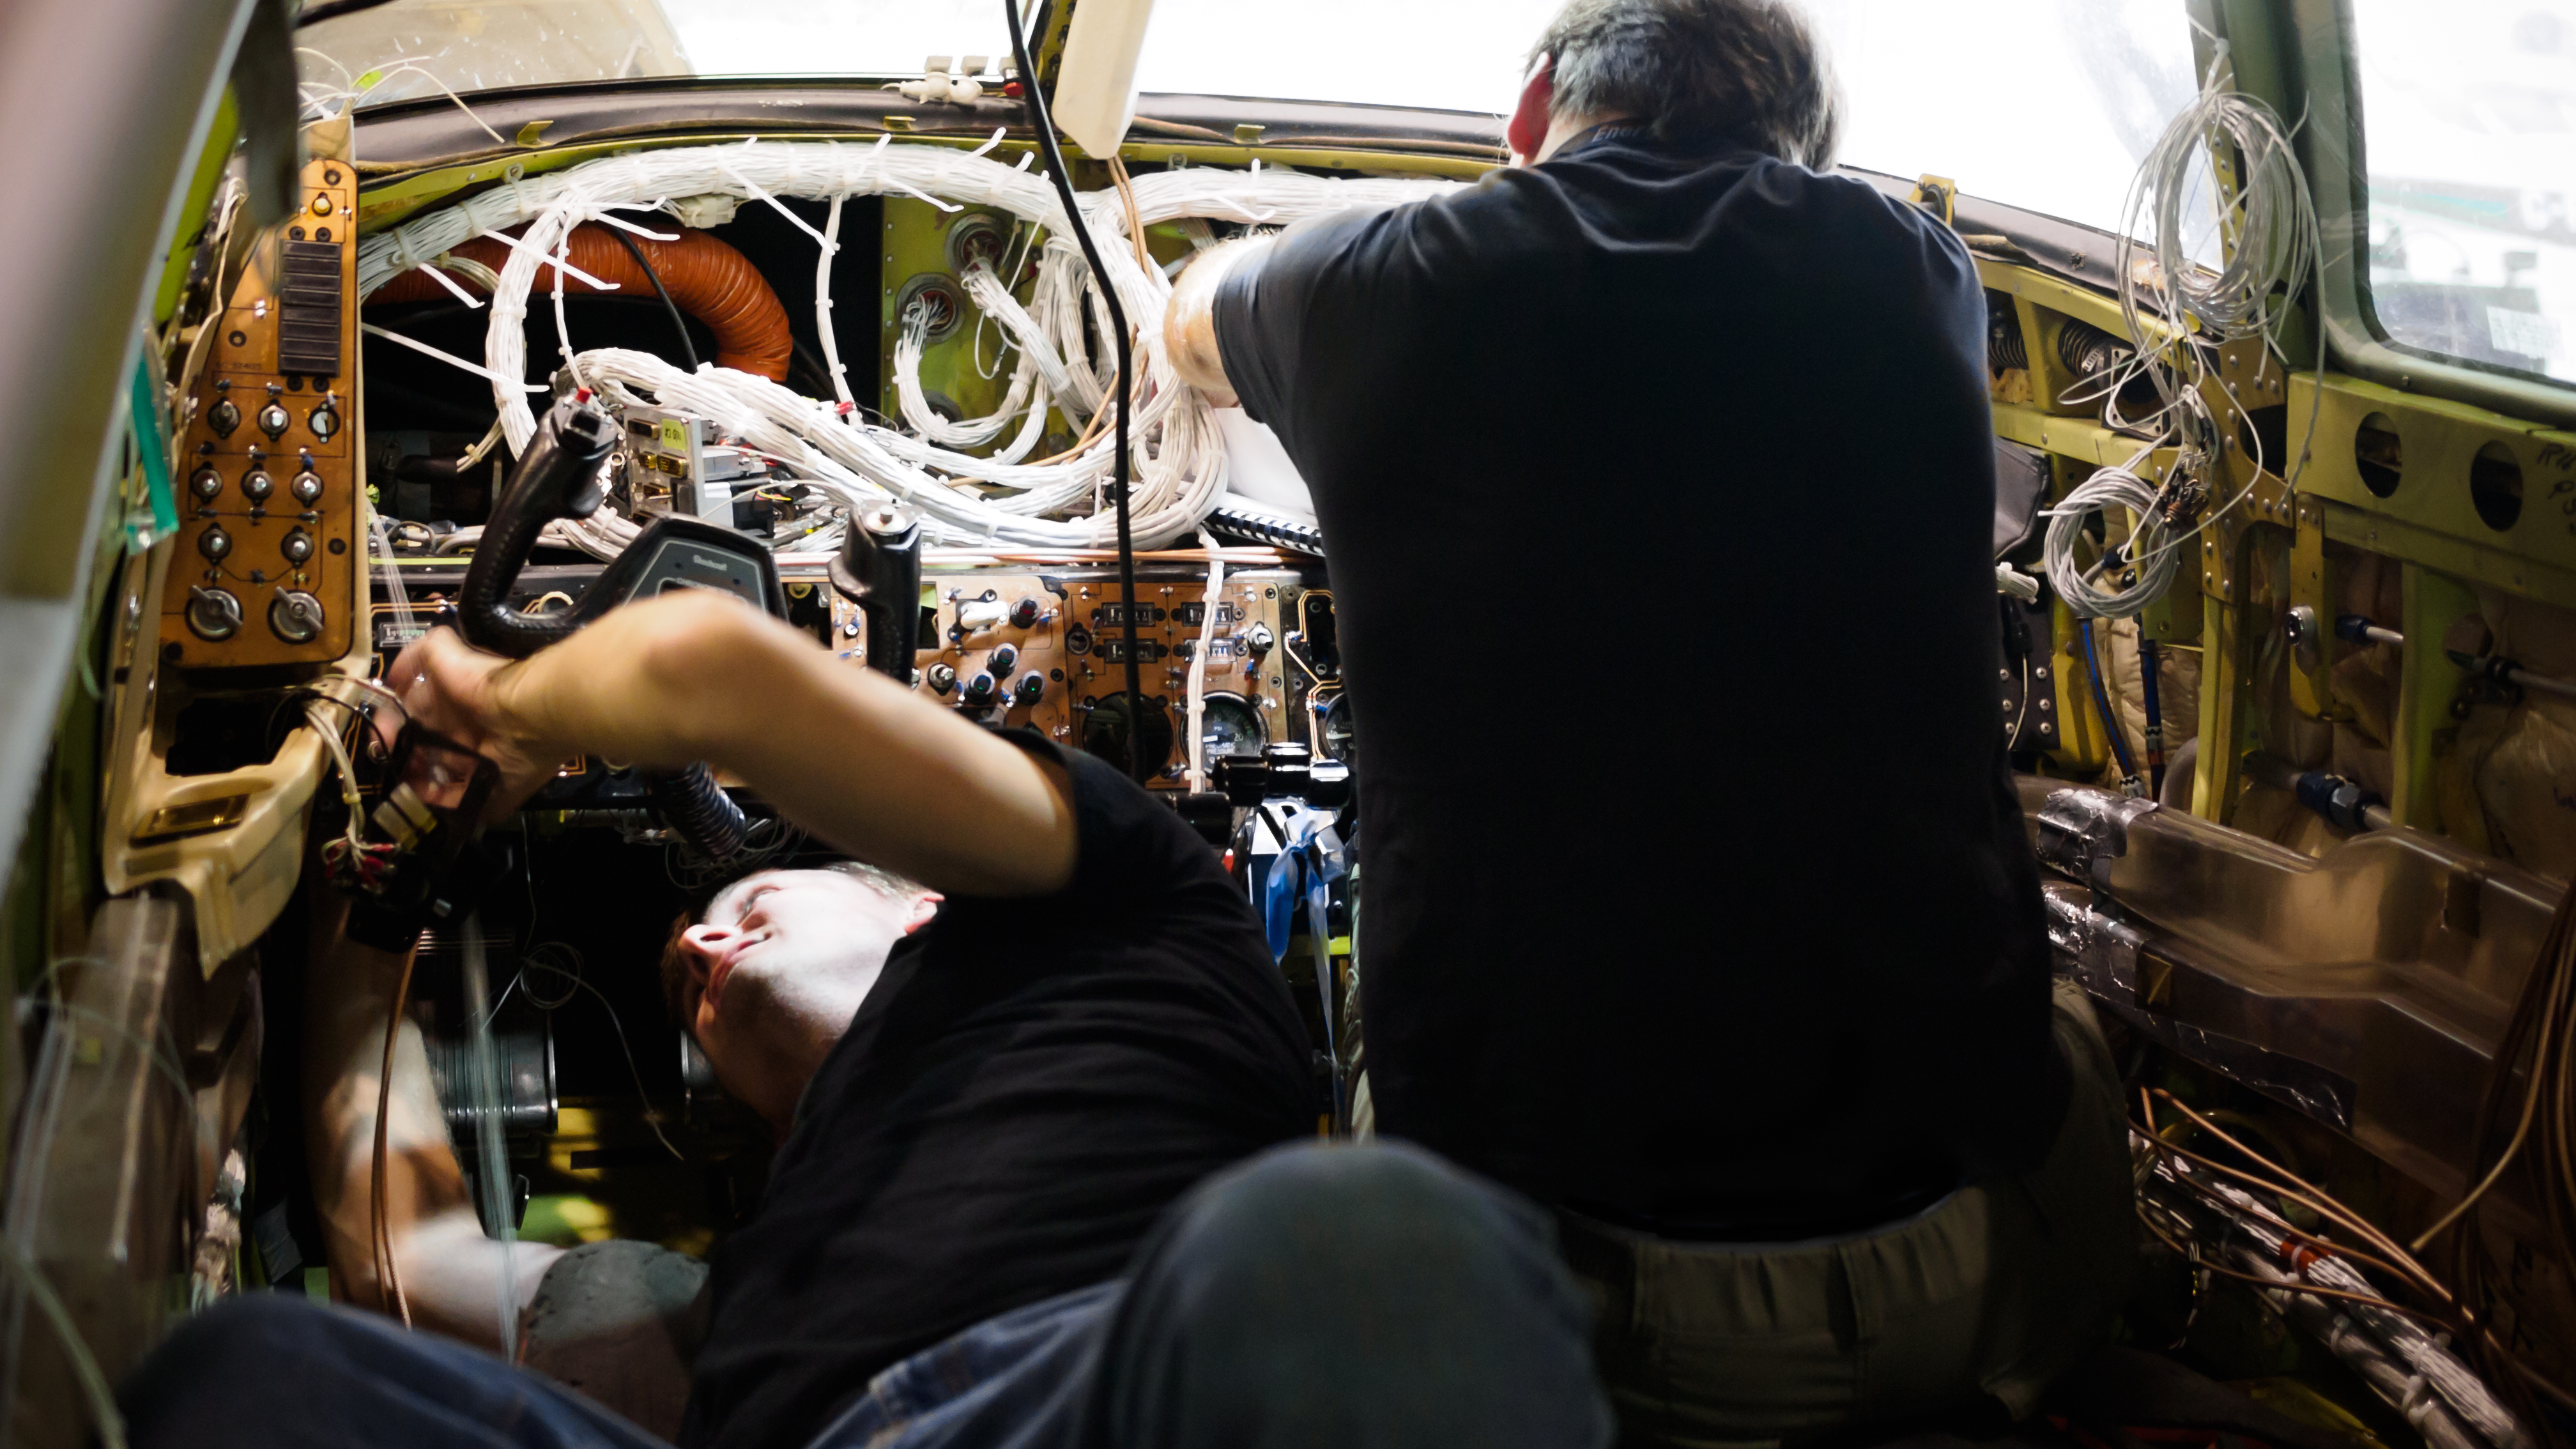
On the aircraft our technicians continue to lay, secure, and terminate wire with as many as five avionics AMEs and apprentices working on the aircraft simultaneously. This is exceptionally complex work and accounts for the lion’s share of labour on a project like this.
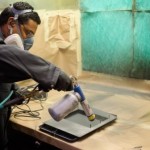
On the bench, instrument panel work continues well. In fact, we’ve arrived at one of the more entertaining stages of an installation: equipment test fitting. It’s a moment with a lot of visual impact, and gives you a very good idea of what the final product will look like. Prior to this stage our panel test fittings are done on the aircraft itself using a Plexiglas prototype, which helps us weed out possible design flaws before any actual metal proceeds to CNC cutting. The other benefits of plexi glass is that it’s clear allowing us to see if we have any pieces of hardware touching and that the flight controls are free and clear. No major issues were raised by our test fittings, either with the prototype or with the cut panel. However, after our Plexiglas test, we did decide to raise the height of the final panel in relation to the glare shield. This was done for aesthetic reasons. The fact that both fittings were predictably functional is a result of a careful and iterative design process which we carry out early in the project. After being cutting and fitting, this panel was given our signature MAXPANEL powder coating, and will undergo laser engraving this afternoon.
-
- Equipment test fitting. This is an exciting moment that hints at the panel’s final form.
-
- Panels cleaned and prepped for coating.
-
- The application of the powder coating before the baking process.
-
- Panel coating completed.
-
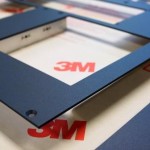
- Close up of the MaxPanel finish. Note the slightly textured surface to reduce glare.
Update 7
Panel Harness on the bench.
This week Maxcraft technicians finished prefabrication work on The Duke’s main panel harness. Because this complete panel replacement is so comprehensive, the majority of work on the panel harness can be done on a bench prior to placing the harness within the aircraft. Even so, connecting and securing the harness is still a serious undertaking, especially when there is other wiring work happening on the aircraft simultaneously and in very close proximity. These ‘intimate’ working conditions can also lead to the spread of illness among techs and missed work. This is exactly what happened early this week. Fortunately Maxcraft’s management takes setbacks like this into account and sets buffered schedules, adding safety time to project baseline schedules, which ensures timely completion. Due to the size of its staff, Maxcraft also has the option of reassigning technicians to fill gaps in labour.
Panel Harness placed in aircraft. Nothing connected yet.
The same harness further into the wiring process.
These backplates will eventually be secured to mounting trays in the new panel.
Work in progress.
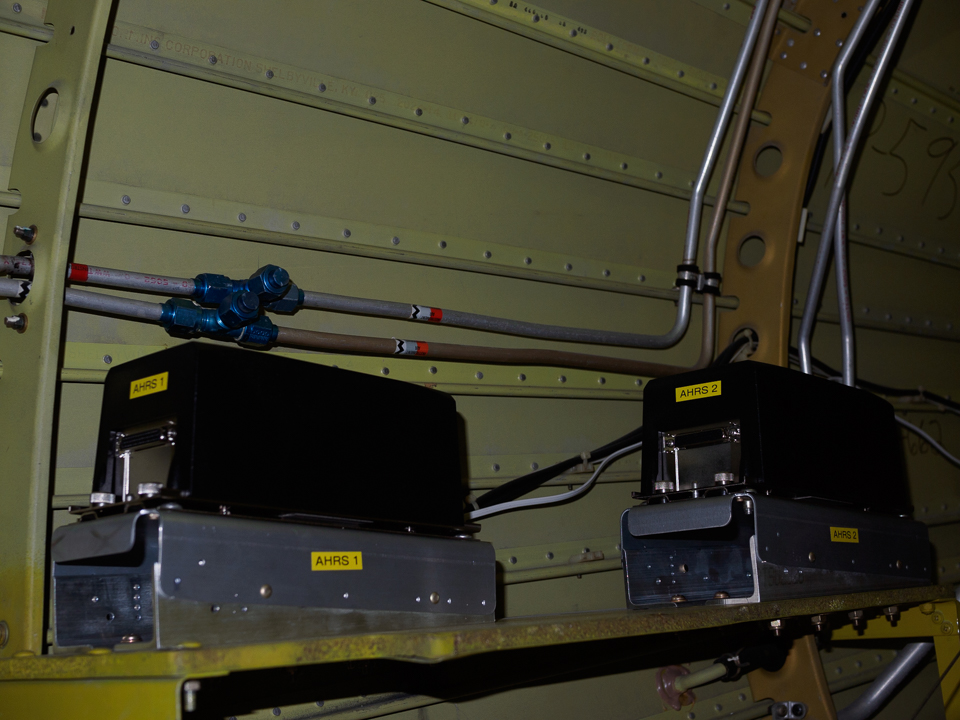
On the structural side of things, ‘beefed up’ mounting solutions have been completed for No 1 and 2 ADHRS boxes in the tail section of the aircraft. Now that they are properly mounted, they are ready for hookup. Note the precision-angled mounting brackets that allow for level mounting on an angled shelf.
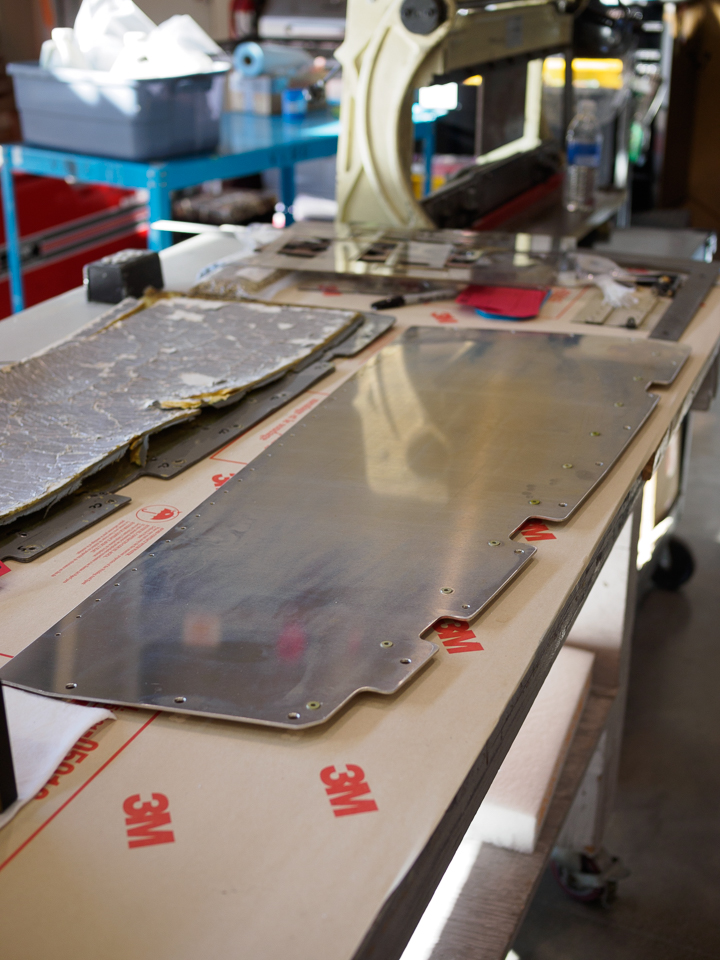
Early in our teardown and inspection of the aircraft, our techs noticed that the avionics access cover in the forward baggage compartment had deteriorated significantly. It appeared that this honeycomb composite material had become partially delaminated. Removing this floor cover for repair revealed the damage to be even more severe. The outer layers of the laminate had in fact separated completely, putting the structure beyond repair. This solid piece of sheet metal was cut as a replacement for the deteriorated composite panel, which you can partially see on the left.
Update 6
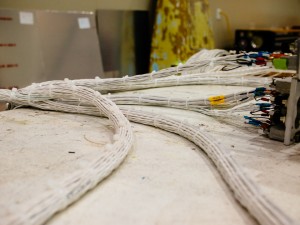
This week’s Duke Update will be largely photographic with regards to avionics. Wiring prefabrication work from last week has continued this week, resulting in the particularly complex apparatus you see here. Descriptions don’t really do it justice, so have a look yourself.

Wire Harness

Wire Harness

Wire Harness

Wire Harness
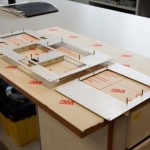
There’s more to these projects than avionics, however. Structural work on the main panel and several remote box mounting shelves has also started this week. Existing mounting shelves were modified and ‘beefed up’ where necessary to accommodate new equipment. A Plexiglass panel mockup was also cut for practical test fitting. By and large, the single greatest structural challenge on this project has been working within space constrains. We’ve already mentioned our unique placement of the auricle engine monitor in this aircraft, but that’s just one example. Fitting issues for avionics involve working around existing structure and systems as well as flight control linkages and other moving parts. All of this must be done while ensuring that weight and stress from new equipment is transferred to the primary structure, and that any loss of structural integrity due cuts or modifications is replaced through the addition of appropriate supports, which themselves must be placed within limited space. In short, structural regulatory requirements are no less stringent than those of avionics; complying with them while simultaneously fulfilling our “custom shop” layout obligations to the customer is a serious undertaking, especially considering the size of this aircraft in relation to the sheer volume of new equipment.

Ben – structures

Mounting shelf

The Team
Update 5

“It doesn’t get much cleaner than this.”
As promised, here’s a sneak peek at our nearly-finalized panel layout. This is the sum of several weeks of iterative consultation and revision between the client, our sales and design teams, and this project’s crew chief. While this takes time, all of it is aimed at ensuring total alignment between our client’s needs and the final product.
Other updates this week are more routine. As is often the case about halfway through a complex and comprehensive upgrade, The Duke project is now exhibiting a lull in fresh activity and interesting developments. With inspections already complete, there are no new surprises to uncover. However, while details like panel layout are still being finalized and approved, certain tasks must be deferred in favour of more mundane work. During this week the aircraft doesn’t look all that much different on a day-to-day basis. Everything remains disassembled and newly laid wire is in varying stages of connection and termination… but to a layman looking only at the aircraft itself, it can appear that not much going on. This is in part because functional and non-functional bundles of wires look more or less the same to the naked and untrained eye. However, it is also because a large portion of the work in laying wire happens before the wire is actually placed in the aircraft. As illustrated in these photos, there are several labour-intensive stages of preparation and pre-fabrication that occur before wire even touches the aircraft.

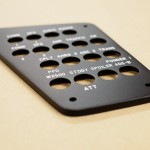
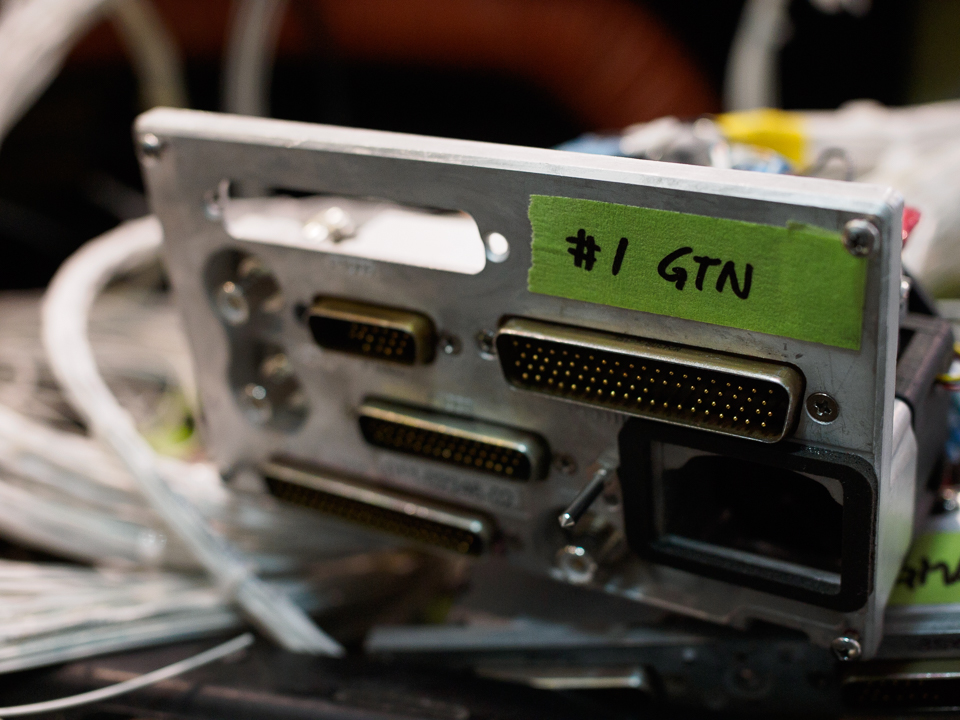
“Preparing wiring harnesses, trays, and GTN750 backplates”

In addition to their work on wiring, our technicians have also continued to investigate and troubleshoot various faults either reported by our client or discovered during our initial teardown and inspection. Of six tank probes removed from the Fuel Quantity Indicating System for testing this week, five failed our resistance checks – likely as a result of internal corrosion. Our purchasing staff has determined that four of these probes have readily available (though somewhat costly) replacements, while the fifth is a special order with an extremely long lead time. As an alternative to outright replacement, our techs investigated and confirmed the possibility of refurbishment as a more time and cost efficient solution. All five probes are therefore being sent out for overhaul and will be back for install well within the parameters of our itinerary.

“Damaged and worn original backlit side panels were also sent out for repair and refurbishment this week”
Update 4
Up until this point we’ve refrained from disclosing too many details regarding the equipment included in this installation. This was partially to draw out reader interest, but also to make sure equipment selection was 100% finalized. All in all, this is probably the most advanced Avionics package that Maxcraft has ever installed in a GA aircraft. When completed, there will not be a single round analog gauge left in this cockpit. If you’ve been waiting to see an equipment list, your wait is over. Feast your eyes on this:
The Beech Duke will leave Maxcraft with:
- Not one but two Garmin G600 primary flight displays
- Dual GTN750 GPS/NAV/COMs
- AuRACLE CRM2120 Engine Monitor System,
- WX500 Lightning Detection system
- Trilogy ESI-2000 electronic standby instrument display,
- GTS 825 Traffic Advisory System (with dual GA58 Directional Antennas)
- GMA35 remote audio system
- GAD43e box for full integration with existing KFS250 Autopilot System
- GDL69A for XM WX Satellite Weather on the GTN750 navigators
- GDL88 ADS-B datalink, which adds ADS-B “In” traffic and weather
- GTX33ES transponder with extended squitter for ADS-B “out” compliance
- Custom built, coated and laser engraved Maxpanel

Laying wire
In addition to new equipment installations and integrations, Maxcraft Technicians are also testing and repairing the KFS250 autopilot system, which will not be removed, but will instead be integrated into the new Navigation system.
Other major updates this week include final decisions on remote box layout, as well as some final panel layout tweaks (we’ll be posting a panel drawing next time). These decisions allowed our technicians to begin laying the pre-fabricated wiring harnesses that they have been working on the preceding week. Equipment layout on a project like this is especially tricky because of the sheer volume of equipment involved. Although a Beechcraft Duke is by no means a tiny aircraft, it can still be challenging to fit everything in. For example, the AuRacle Engine Interface Unit which our technicians mounted this week required a somewhat unusual solution.

Engine Interface unit mounting
On this particular aircraft the preferred mounting location for the right engine is unavailable, being occupied instead by an air conditioning system. As an alternative, our structures personnel constructed a slanted reverse hat section in the rear portion of the starboard engine nacelle. This mounting solution is made of formed sheet metal and is easily removable for maintenance access via anchor nuts. In the long run, this repeatedly saves hours of labour during the course of regular maintenance.


Update 3
We’re now into week three of our Beechcraft Duke project and work is in full swing! Our team has de-modified, and removed all existing systems, resulting in significant weight reductions. Removals include an unnecessary inverter system, hundreds of feet of superfluous wiring, and the instrument air vacuum distribution system, including two regulators and associated plumbing. Deletion of this air system was made possible by plans to completely replace all vacuum gyros with a new glass panel (more on that next week).

Superfluous wiring has been removed; remaining wiring has been re-tied and cleaned up.
Lastly, two 50 pound ballast weights were found in the nose baggage bay. Because of the discovery of these weights, our team is now investigating the possibility of mounting more new equipment in the nose rather than in the aft fuselage. This would hopefully improve the operational centre of gravity, negating the need for nose ballast and saving even more weight.
After removing major systems, the team proceeded with wiring clean up and repair behind the panel. This involved the removal of old wiring followed by a panel layout review. Other additional work that week included a new spoiler lighted switch, autopilot system repairs, and progress on avionic wiring and interface prefabrication. Engine monitor probes continued to challenge us, as the probes received did not fit the threaded bosses on the intake manifold. New versions have been ordered to correct that issue. This will ultimately result in a working intercooler display.
Like many major projects, there have been some unexpected discoveries during disassembly. For example, physical inspection revealed that existing autopilot system differed significantly from the drawings we have on file. Interfacing this system our new equipment therefore necessitates that we either acquire relevant drawings, or reverse engineer the wiring installation through inspection and testing.
In addition, to avionic challenges, there were a number of structural surprises as well. A previous unapproved installation had mounted tubing through a pressure vessel without proper sealing. By repairing this defect, our technicians were able to eliminate excess cabin noise caused by whistling air – a source of complaint for our clients. Next, an outboard hinged panel in the forward baggage bay which provides access to an under floor avionics bay was discovered to be in poor condition. This structure is of composite sandwich construction with thin outer layers of aluminium and a thin honeycomb core. The panel is seriously delaminated in several sections. Neither of these complications are insurmountable or particularly rare. In fact, they are the rather typical kind of challenges that regularly crop up during the course of a major avionics project.

Delaminated Structure

Hose through Pressure Vessel
Update 2
What else is going in?
- Auracle Engine Monitor
- We have installed the EGT and CHT probes on both engines.
- Removed fuel transducer in both engines, removed and installed oil temp sensor LH engine.
- EIU modules locations have proven to be a challenge due to lack of mounting space. We plan to mount the LH EIU in the battery/electrical compartment and mount in the outboard compartment of the engine nacelle for the RH due to the air conditioning equipment. We will then route the wire under the AC fan housing and then followed the existing bundle.

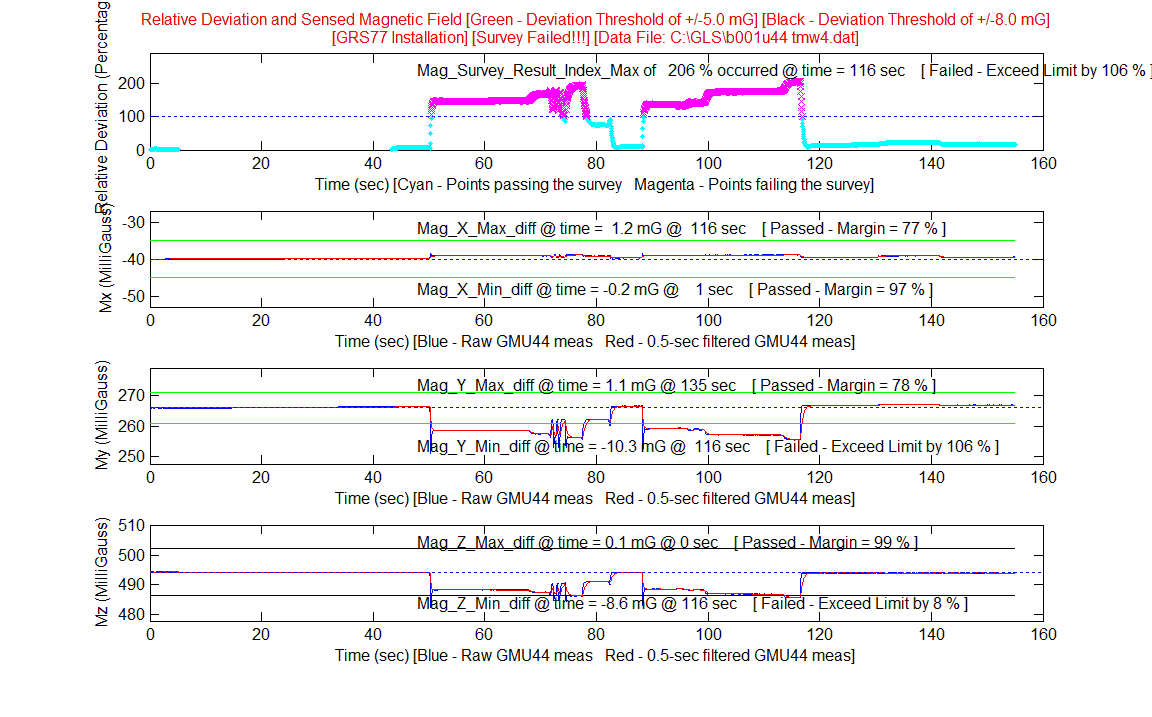
- Magnetometer Survey
- Before we install the Magnetometer for our heading direction of the G600 displays we have to ensure we do not get any interference from other electrical components.
- This involved nearly a day of testing potential mounting locations and turning on all the electrical devices and observing out test software to see the results.
- As is most typical, no location was clean. We ended up mounting it in the tail and having to re-locate the strobe light module

Noting failure of first magnetometer tests

Magnetometer wing mounting tests
- New wiring
- We have started the nose baggage area wiring removals and carry throughs of the pressure vessel bulkhead from the cabin instrument panel.

- Design work
- Our engineering group has been working hard coming up with a suitable panel design and has forwarded this to the crew chief for feedback.
- The criteria here is multifold – we need to ensure it is safe, structurally sound, and aesthetically pleasing.
- Next week we will have a numerous panel designs to run by our customer for their approval.
- The preliminary wiring diagrams are done and waiting for final design approval.
All in all it’s going very well so far, no big surprises, and we are on schedule.


All we can say is: “There is no going back now!”
Update 1
We said we would keep you updated so here is our second installment. Before we even got started on this airplane we needed to understand what existing snags were on this aircraft. The autopilot is being retained and had some known problems, so a thorough test flight was performed with our techs, test pilot, and our customers. Now we have a known starting point.

Interior removed
The Duke has been in the hangar for a week now and our team have been hard at it, working to remove the interior and panels for access, all of the old existing avionics equipment has been removed, and as well as most of the old wiring.

Instrument panel removed with a mess of wires uncovered!
The instrumental panel has been removed, and as you can see, the wiring behind the panel is less than ideal! No worries though, some of that is coming out, and the remaining bundles will be checked out and properly secured. Our customer was experiencing electrical “gremlins” and asked us specifically to go through the remaining wiring, test and clean up.

Cowls being removed
Bench testing of the autopilot servos and servo mount clutches are underway at our repair shop upstairs. Our Design group has most of the CADD drawings (the avionics wiring interconnects) complete. As well we will remove and old wiring unused wiring left behind saving some precious weight.
We are now planning and prepping for the installation of the Auracle engine monitor boxes and associated wiring.

Preparation for Auracle engine monitor installation
On a job of this magnitude, scheduling the order of the tasks is very important to minimize the downtime of the aircraft. Some components need to be repaired, others (like the backlit panels) need to go outside vendors so those need to be prioritized first. Over the next few weeks the airplane is going to look a lot worse before it starts coming together! Stay tuned for more info next week!
The Beginning
This week we’ve welcomed “The Duke” Beechcraft into our home-base hangar. Beech Duke aircraft are often referred to as the classic sports cars of aviation. Owners of this particular beautifully maintained aircraft wished for an avionics suit modernization to match it’s extremely capable airframe performance. Following a careful deliberation process the aircraft owners have selected one of the most impressive avionic modernization packages available to turn this aircraft into the most technologically advanced Duke on the planet.
To follow the upgrade process and see what we are up to, stay tuned for our weekly updates to witness history in the making – one week at a time.


So it begins!
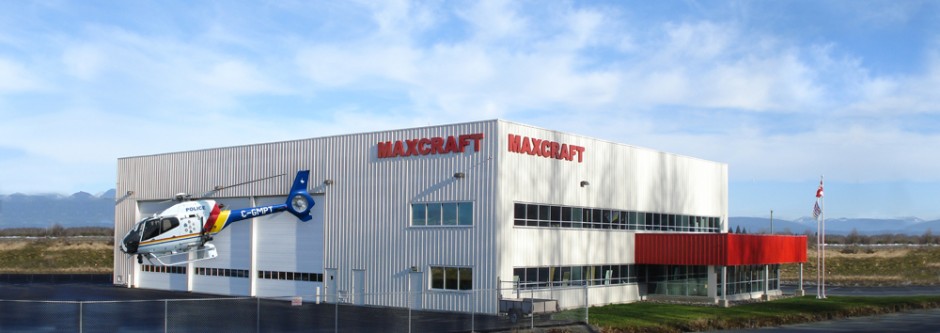
Maxcraft Avionics is a leader in airplane and helicopter avionic system upgrades, including installation of everything from basic VHF Radios and flight instruments, all the way to sophisticated GPS, TCAS, EFIS, and glass cockpit systems. We have the largest avionics facility in Canada and over 20,000 unique part numbers in our inventory to repair your aircraft or upgrade your cockpit.

